Although you may have heard the terms "DSLR" and "Single Lens Reflex", many people are still confused as to what they actually mean. SLR stands for single-lens reflex and 'digital single lenses reflex' refers to the way they work. A digital SLR (digital single-lens reflex) is a type digital camera that employs a mirror that flips to expose a photosensor. The lenses can be exchanged and are removable.
DSLR
DSLR is a digital single-lens reflex camera. A DSLR is a modernized version of the classic film-based SLR camera. It features one lens and an interior mirror. This flips up as the shutter opens. Professional photography is often done with a DSLR. There are two types of DSLRs: standalone cameras and those that include a mirror. This article will discuss the basics of a DSLR and the differences between an SLR and DSLR.
A DSLR camera can have many buttons. The shutter release key takes the picture at its settings. A half press activates auto-focus. Focus assist beam is used to illuminate the subject in poor lighting conditions. The menu button accesses internal menu functions. A jog dial and select buttons are also used for navigation. A DSLR can also be used for recording videos. The ISO settings of a DSLR digital camera may vary depending on its manufacturer.
SLR
Digital cameras are often referred to as Single Lens Reflex. Film cameras were used to develop on large rolls of film. After processing, they had to be reprocessed. The same mechanism is used in digital cameras that use digital imaging technology. A single lens reflex system uses light to create images. It directs light through a series moving mirrors to a viewfinder or film element. They can be transported and run on batteries. Digital cameras have replaced film cameras for many decades. Technology has brought about a significant improvement in picture quality.
The difference between digital and film cameras lies in the sensors and features. Digital SLRs are more user-friendly than film cameras. They also offer higher resolution and manual control. The resolution of smaller and less expensive versions can reach 12 mega pixels. Another advantage of the digital SLR is the ability to instantly snap pictures without any lag or delay. This can be very useful if you need a picture of moving objects, such as a baby. And digital SLR cameras are becoming more popular with amateurs. Canon and Nikon are the main brands.
'Mirrorless' cameras
The main difference between a Mirrorless and a David Wallie digital camera is in their optical systems. Mirrorless cameras use an in-body five-axis image stabilization system, while most DSLRs lack the technology. Some mirrorless models have this feature, such as Pentax K1 or K3 III. This feature makes it possible for the camera to compensate movement along three axes. It results in sharper pictures than traditional cameras.
"Mirrorless cameras" have interchangeable lenses. This allows the photographer the freedom to choose the best focal length for their shot. Because they are smaller they are easy to carry around and can be used for street or travel photography. They are also less expensive than DSLRs so you can afford them. A budget-friendly and affordable mirrorless camera is available for purchase starting at $550

Use large format lenses with digital camera slr
If you're looking for a way to save money, then using large format lenses from an older digital camera is a good choice. High-quality lenses will be available at a very affordable price. These lenses have great optics and are well-used for years. These lenses offer excellent value for money. In fact, barrel lenses can often be quite affordable, and they're compatible with most Packard shutters.
A large format lens that is used can be quite difficult to mount on your camera. Some lenses have a standard length thread. For these cases, step-up rings or step down rings can be used to convert them into a camera mounting. You don't need step-up or stomp-down rings to make threads for your lens.
FAQ
Do I Need A Tripod?
This is one question that everyone wants to know. While a tripod isn’t necessary every time, it is useful.
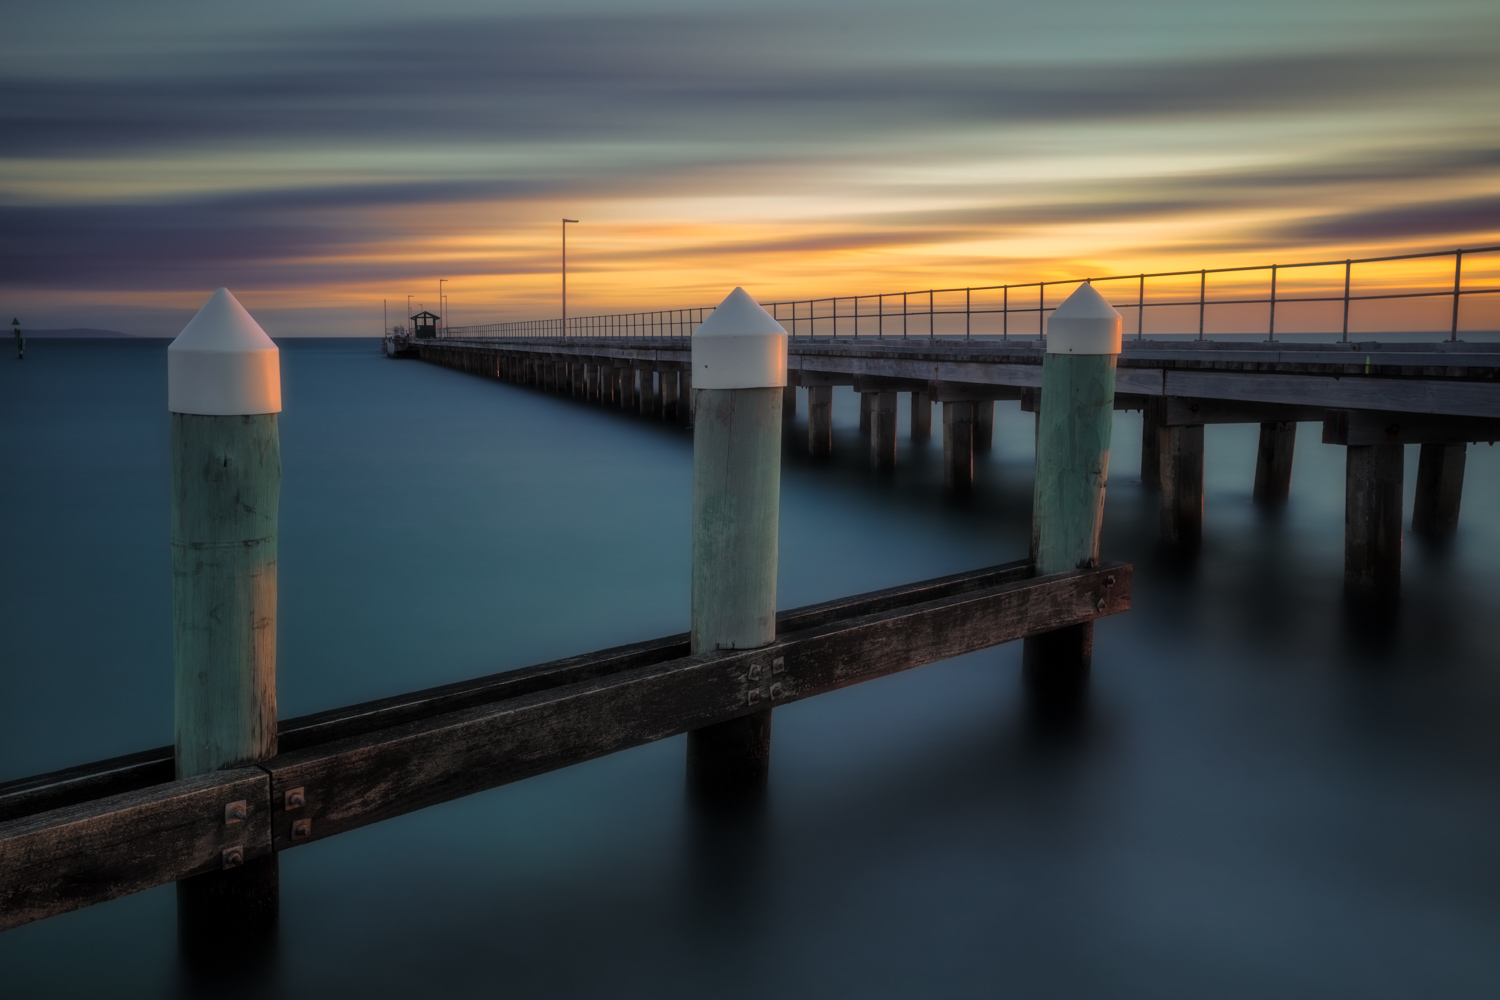
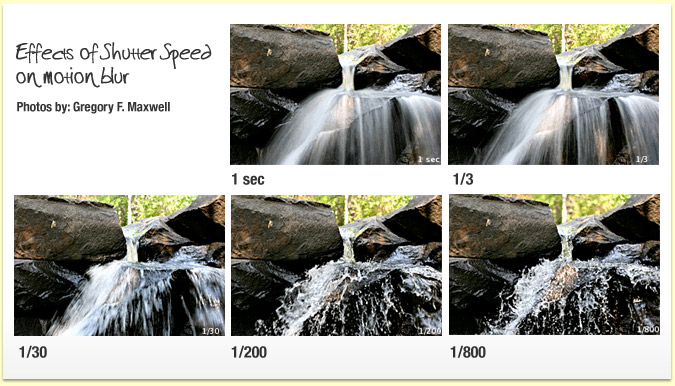
It helps you keep your camera steady while taking pictures at slow shutter speeds. A tripod is a great option for landscapes and other stationary subjects.
However, a tripod can blurriness if you are photographing moving subjects, such as people or athletes. What are the best ways to determine which situations you need a tripod for?
A tripod is useful when you need to photograph stationary or fast moving subjects. Examples include:
-
Sports
-
People
-
Landscapes
-
Close-ups
-
Macro shots
This test will help you determine if you need a tripod. You can hold your camera still while you look through the lens. A tripod is required if there are blurred lines, movement or other issues.
A tripod won't make any difference if there is no blurring.
Here are some tips for those who do decide to buy a tripod.
-
Smooth legs are a must for your tripod. This helps to prevent vibrations from shaking the camera.
-
Use a sturdy tripod. Some tripods are made of plastic, so they may not be as durable. Opt for a sturdy metal tripod.
-
A remote release is a great option. This allows you to control your camera remotely. The button can be pressed to activate the shutter.
-
A tripod that can rotate 360 degrees is a good choice. This makes it easier for you to position your camera horizontally, or vertically.
-
Keep in mind that tripods aren't cheap. Expect to spend around $100-200. However, you'll get lots of value for your dollar.
-
Accessories such as memory cards and filters are important.
-
Before shopping online, be sure to visit your local shop. Many retailers offer free shipping.
-
To find out what customers think about a product, read reviews.
-
Ask family members or friends to share similar products.
-
For customer feedback, visit message boards and forums.
-
Find user reviews online.
-
Use websites like Amazon.com to compare prices and read customer feedback.
-
Check out these photo galleries for an example of the work that photographers do with their tripods.
Which Lenses should I Use?
The most popular question that beginners ask is "What lens do I need?" The choice is difficult because of the many options.
There is good news: You don't need to buy new lenses every time you buy a new camera. Instead, you can add lenses later on.
These are just three options for lenses that you might consider.
-
Wide Angle Lens (14mm - 24mm): These lenses give you a wide angle of view, allowing you to capture more of your subject. Zooming in can be done without affecting image quality.
-
Standard/Normal Zoom Lens (28mm – 70mm): These lenses allow for you to adjust focal lengths and maintain image quality.
-
Telephoto Zoom Lens (70mm, 200mm): These lenses work well for distant subjects. They allow you to focus on your subject despite the fact that they may seem small in the frame.
These lenses can be combined in a variety of ways to create new effects. For example, you could use a normal lens to shoot close-up details and switch to a telephoto lens to capture far away objects.
What camera is best for beginners and what are the pros and cons?
Your budget, your needs, and your skill level will determine which camera is best for beginners.
For instance, you could choose a point & shoot digital camera if your goal is to save some money. These cameras are not very versatile but offer excellent quality.
Digital Single Lens Reflex (DSLR) cameras have interchangeable lenses that allow you to shoot various types of shots. These cameras are generally more expensive that point-and clicks, but provide greater flexibility.
For beginners to photography, the beginner's set is a great place for you to start. Everything you need, including a flash, tripod, memory card and camera body, will be included in the one-pack.
You should also remember to buy additional batteries.
How can my phone improve my photo skills?
You don't need expensive equipment to take great photos! With just a smartphone, you can capture amazing images.
You just have to know how to use all its features and learn some basic techniques.
There are many apps available for both Android and iOS devices that make it easy to edit and share your pictures.
Here are five tips to help get you started taking better photos.
-
Set Up Your Camera App. The camera app should be pre-installed on the device. If not, download it from Google Play or Apple's App Store.
-
Use effects and filters. Filters and effects allow you to change the appearance of your photo without having to touch your image.
-
Adjust Exposure. You can adjust exposure to alter the brightness of your image.
-
Take the right lighting. Photographing in bright lighting makes it easier for you to see details within your subject. If you shoot in low light, it is possible to capture shadows or highlights in your photo.
-
Photograph People. Take pictures of people to show them what you love the most.
Check out this article to learn how to take better pictures with your smartphone: 5 Tips To Improve Photography Skills
What is the rule of thirds in photography?
The rule of thirds is an easy way to create interesting compositions without using complicated camera settings. It divides your image into nine equal parts, horizontally and vertically. This creates three main areas for your subject to appear. These are the top (upper left corner), middle (center) and bottom (lower right). These areas are useful for positioning your subject in your frame.
The rule of thirds also helps you avoid placing important elements too close together or too far apart. They may not be able to create a strong visual impact if they are too close together. They might lose focus if they are too close together.
How do I become a good photographer?
Photography is an art that takes patience, dedication and passion. If you are passionate about your photography, you will do much better than you would if you were only interested in making a living.
It is essential to understand how to use your camera effectively. It is important to understand the basics of composition, lighting and exposure. A good understanding of Photoshop is also necessary.
Photography can be difficult but once you get the hang of it, it's a rewarding art form that allows you to capture moments in time that otherwise would have gone unremembered forever.
You can improve your skills by reading books, attending classes, and participating in competitions. This will give you experience and confidence that will help you improve. What equipment is required?
It all depends on what type photography you do. If you're interested in landscape photography, for example, you'll need a wide-angle lens.
A telephoto lens will be a must if you are interested in portrait photography.
A tripod is crucial for taking photographs. A tripod allows you to stand still and compose your photograph without having to move.
Camera bags are great for carrying your accessories, such as memory cards and cameras.
If you are using a compact lens, a flash is needed.
A DSLR (Digital Single Lens Reflex), camera is the best choice for novice photographers who wish to create professional-quality images.
DSLRs are very popular because you can control every aspect of the photo including shutter speed, apertures, ISO sensitivity and white balance. A variety of features are available such as autofocus and auto-exposure locks, bracketing, self-timer, and RAW formatting.
Statistics
- That's the easiest way to get blurry photos 100% of the time. (photographylife.com)
- The second easiest way to get blurry photos 100% of the time is to use a cheap filter on the front of your lens. (photographylife.com)
- While I cannot prove that all of those spots were not sensor dust, the photo was taken during a heavy snowstorm…so I guess that 99.8% of the spots are snowflakes. (bhphotovideo.com)
- This article received 13 testimonials, and 100% of readers who voted found it helpful, earning it our reader-approved status. (wikihow.com)
External Links
How To
How to capture pictures under low lighting conditions
Low-light photography is the art of taking photographs in dark or dimly lit environments. It requires special equipment. The main challenges include controlling exposure, white balance, and sharpness. Two types of low-light photography exist: ambient or flash. Flash photography works best when there's enough light around. A flash is required if there isn’t enough light. Without a flash, it is possible to get a poor picture if the subject is indoors and not outdoors. A flash is not necessary if you aren't interested in shooting at night with the moonlit hours. You'll be able to capture beautiful colors and shadows this way. Another option is taking photos at twilight. Twilight occurs when there is still daylight but the sun has set.
Long exposures are also an option. Long exposures can be used to capture images even if the shutter has been closed for several minutes. When the shutter remains closed, the camera records only light that falls on the sensor. This light continues to fall onto a photo sensor throughout a prolonged exposure. The shutter is still closed so no light can enter the lens. As a result, you see very little movement. To ensure you're getting a clear image, turn off any automatic settings like autofocus and auto exposure. Make sure to adjust the ISO setting before starting to shoot. An ISO setting of 200 gives you more flexibility to control how bright or dark your image looks. Once you are ready to click the shutter button, make sure it is fast. This causes the shutter to close completely. Hold the shutter button down for the final second. The shutter button should be held down to prevent more light from entering the camera. Once you have taken the image, wait for a few seconds before you release it. This allows the camera time to process the photo. While you wait, your photos will be displayed on your computer's screen. Once you are satisfied, save them on your computer.