
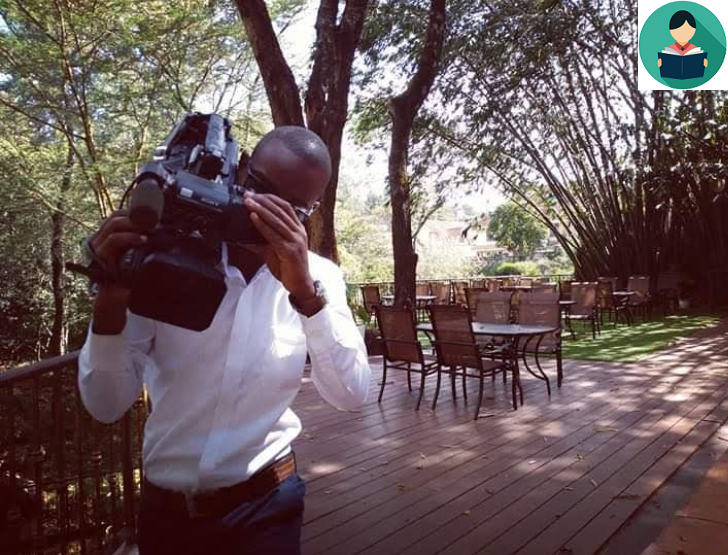
Landscape photography is all about the art of leading lines photography. The paths the eye follows naturally are the leading lines of a photograph. They could be any familiar travel route like a street or a sidewalk. Here are some tips to help you improve your own photography. Find out the secrets to great leading lines photography. We will look at both vertical and curved leading lines. Let's look at both types of leading lines and see how they can be used to your advantage.
Rule of thirds
The Rule of Thirds in photography is an essential composition principle. Using this rule will allow you to take better photos and give your viewers more information about the scene. This rule is often overlooked, but it is important to know when it should be used in your own photography. It can be useful in landscape shots, where the landscape is large, or to highlight a specific detail. While taking portrait photos is a great way to show off your details, you need to remember the rules of composition.
If you are using the Rule of Thirds to compose your portraits, you should center the subject in the top third of the frame. You should also aim to have the subject's eyes pointing into the frame, as this will lead the viewer's eye deeper into the picture. This technique works well when more than one subject is involved. As the subject should be looking up, this will help to guide the viewer's eye towards the higher line. Make sure the subject is looking in the frame for portraits or landscapes.
Long palette knife
You can create subtle textures and swirls by painting with a palette knife. Before you start the next layer, make sure to remove any paint left on the knife. This technique is not able to be reversed if it accidentally damages a section of your artwork. To avoid mistakes, always scrape off a portion of paint with a paper towel or cloth. Next, place the remaining scales in a logical order. Continue this process until you reach the desired number of textures and swirls.
The Long palette knife can be used to make straight or curved lines. It is versatile enough that it can be used with canvas, plywood or board. When used properly, it also makes for a great tool for creating spiky or fan-like lines. Its unique ability to produce beautiful and unusual effects is the best proof of its versatility. Both beginners and professionals can use it.
Curved lines
Curved lines are everywhere in nature. They allow viewers to move more slowly and leisurely through photographs. S Curve is a commonly used curve in photography. This flatters the female body while gently leading the eyes around the photo. These are some ways to use curved lines in photography. These tips will help you create stunning photographs. Read on to learn about a few ways you can use curved lines in your photography.
First of all, curved lines add a sense of movement and soften an image. Straight lines give the subject an unnatural appearance, but curved lines let the viewer focus more naturally on the image. A curved line adds a certain mood to the image, giving it an air of romance or drama. Curved lines, while more romantic and dramatic than straight lines, suggest a journey rather that a destination.
Vertical lines
Here are some tips on how to use vertical lines when photographing your photos.
For viewers to be able to see the top of the photo, draw their attention upwards or downwards. When composing your photograph, remember to follow the Rule of Third. The vertical line divides the photo into two equal parts. It conveys strength, dignity, power, and strength. These lines can be used to highlight the subject matter or they can be relied upon for their inherent power. Remember that a strong vertical element is not always the strongest in your photos.
FAQ
Do I Need A Tripod?
This is one of those common questions. Although a tripod might not always be needed, they can be useful.
It allows you to hold your camera steady when taking pictures at slow shutter speeds. Tripods can be a huge help when you are shooting landscapes or stationary subjects.
However, using a tripod to photograph moving subjects like people or sports can result in blurriness. So, how do you know which situations require a tripod?
A tripod is useful for any situation where you want to photograph fast action or stationary subjects. Examples include:
-
Sports
-
People
-
Landscapes
-
Close-ups
-
Macro shots
This test will help you determine if you need a tripod. Look through the viewfinder with your camera steady. You will need a tripod if you see blurred lines and movement.
If you don’t see blurring, adding a tripod is unlikely to make any difference.
However, if you do decide to invest in a tripod, here are some tips to keep in mind.
-
Smooth legs are important for tripods. This will prevent unwanted vibrations from shaking your lens.
-
Use a sturdy tripod. Some tripods are made of plastic, so they may not be as durable. You should opt for a steel tripod.
-
Consider purchasing a remote release. Remote control allows you to remotely control your camera. It can automatically fire the shutter when you press the button.
-
Look for a tripod that has a 360-degree rotating head. This allows you to place your camera horizontally and vertically.
-
Be aware that tripods are not cheap. Expect to spend around $100-200. However, you'll get a lot of value for your money.
-
Accessories such as filters and memory cards should be considered.
-
Before you buy online, make sure to check your local shops. Many retailers offer free shipping.
-
To find out what customers think about a product, read reviews.
-
Ask family members or friends to share similar products.
-
Visit forums and message boards to learn about customer experiences.
-
User reviews can be found online.
-
Amazon.com is a website that allows you to compare prices and get customer feedback.
-
Take a look at these photo galleries to see what other photographers do with tripods.
Is photography a worthwhile career?
Photography is an art form that lets you capture moments in your life and share them with other people. It can also make you a lot of cash if your are willing to do the work. There are many routes to becoming a professional photographer. Start by taking photos for your friends and family as a hobby. This will allow you to build confidence and improve your photography skills. Once you have mastered this stage, you can move on to paid assignments. The best photographers can make a living as a photographer. Photographers can accompany clients to weddings or parties where they need to capture images of people enjoying their work. However, most professionals prefer to shoot commercial projects such as product shots or advertisements.
The key to becoming a successful photographer is to find out what type of photography you enjoy. After that, practice, experiment, then master your chosen style. You can't replace experience so don’t expect to be successful overnight.
Begin with technical skills, before moving on to creativity. Photography is both technical and artistic. Photography is a complex art that requires both artistic and technical skills. Understanding the basics of composition can help you achieve your goals faster.
Also, consider whether or not you wish to pursue a career as a photographer full-time. Some people combine their love for photography with other jobs. For example, you might work at a local newspaper or magazine while pursuing freelance assignments. Some people choose to devote all of their time to photography. Whatever your creative choice, you will need to be dedicated and committed to success in every field.
A serious photographer will have to dedicate a lot more time and effort if they want to build a successful career. It is important to think carefully about what you really want to do with your life.
How can my phone improve my photo skills?
Photography doesn't have to be expensive. Amazing images are possible with just a smartphone.
It's easy to get started with the software.
There are many apps for iOS and Android devices that can edit and share pictures.
These five tips will help you take better photos.
-
Set Up Your Camera App. Your device should already have your camera app installed. You can download the camera app from Google Play and Apple's App store.
-
Use effects and filters. You can alter the appearance and feel of your photo using filters and effects.
-
Adjust Exposure. You can adjust the exposure to control the brightness of your photo.
-
Use the Right Lighting The brighter the light, the easier it is to see details. If you shoot in low light, it is possible to capture shadows or highlights in your photo.
-
Take Pictures of People. Take pictures of people to show them what you love the most.
Check out this article to learn how to take better pictures with your smartphone: 5 Tips To Improve Photography Skills
Which is the best camera to use for beginners?
The best camera to use for beginners is dependent on your needs, budget, and skill level.
A point-and-shoot camera is a good option if you want to save money. These cameras are not very versatile but offer excellent quality.
Digital Single Lens Reflex (DSLR) cameras have interchangeable lenses that allow you to shoot various types of shots. While they are more expensive than point and shoots, they offer much more flexibility.
A beginner's package is a great way to get started in photography. Everything you need, including a flash, tripod, memory card and camera body, will be included in the one-pack.
Do not forget to get extra batteries!
Statistics
- That's the easiest way to get blurry photos 100% of the time. (photographylife.com)
- This article received 13 testimonials, and 100% of readers who voted found it helpful, earning it our reader-approved status. (wikihow.com)
- The second easiest way to get blurry photos 100% of the time is to use a cheap filter on the front of your lens. (photographylife.com)
- In this case, 100% of readers who voted found the article helpful, earning it our reader-approved status. (wikihow.com)
External Links
How To
How to take photos in low light conditions
Low-light Photography is when you take photos in dimly lit or dark environments. It requires special equipment. The main challenges in this field include controlling exposure, whitebalance, and sharpness. There are two types low-light photography: ambient and flash. Flash photography is best when there is enough light. If there isn’t enough natural lighting, you will need to use a flash. Without a flash, it is possible to get a poor picture if the subject is indoors and not outdoors. If you don't want to use a flash, try shooting at night during the moonlit hours. This will allow you to get nice shadows and colors. Another option is to shoot during twilight. Twilight is when the sun sets but there's still daylight.
Long exposures may be something you want to explore. Long exposures enable you to take images even after your shutter has been open for several seconds. If the shutter is closed, the camera records only the light that falls onto the sensor. During a long exposure, this light continues to fall onto the photo sensor. Because the shutter was closed, no new light enters your lens. Therefore, there is very little movement. To ensure clear images, disable any autofocus and exposure settings. Before you begin shooting, adjust your ISO setting. An ISO setting of 200 will give you more control over the brightness or darkness of your image. Once you are ready to click the shutter button, make sure it is fast. The shutter will close completely. Next, hold the shutter button down until the end. You can prevent any additional light entering your camera by holding the shutter button down. Wait a few seconds after you have taken the photo before you release the shutter button. This allows the camera to process the image. While waiting, you can check out your photos on your computer screen. Once you are satisfied, save them on your computer.